
INSTRUCTIONS
POWERANCHOR
In the box
The PowerAnchor and accessories come in a heavy duty, purpose designed road-case with wheels, fixed handle and extendable handle ensuring shock-proof storage.
1. Legs
2. Tether cables
3. Utility case
4. PowerAnchor
5. Remote controls
6. Digital scales
7. Recharger
Set up
Set up the PowerAnchor in a flat area indoors, minimum 4.5m diameter. Turn the unit on at the switch on the top (turn off after use).
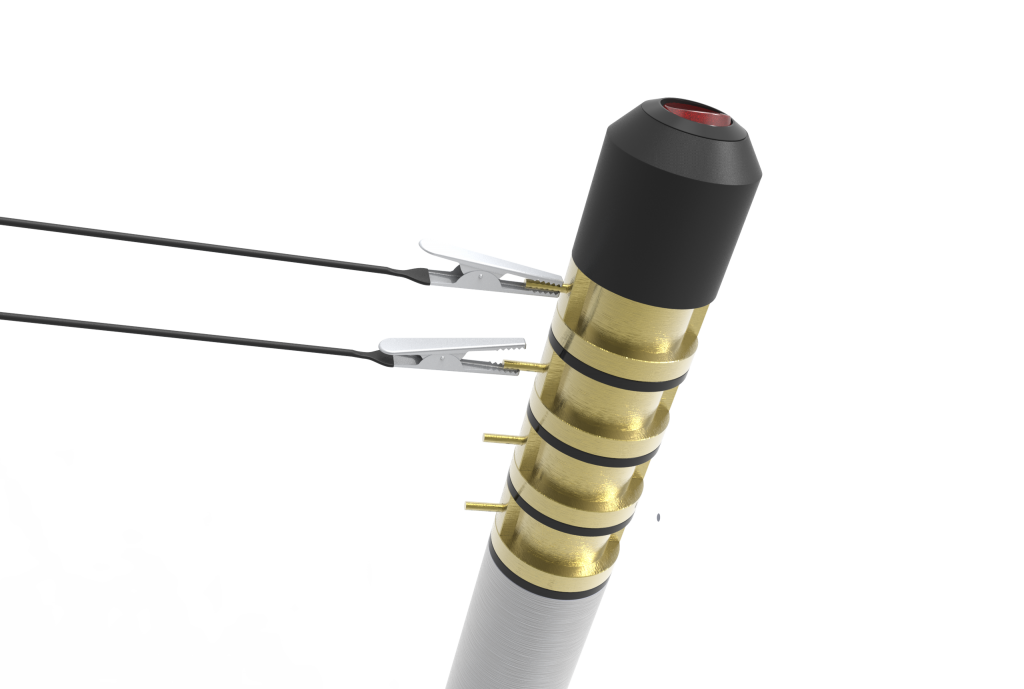
Connect the tether cables to the PowerAnchor by clamping them on to a pair of bushes (upper or lower pair). Connect the other ends to a student made car or plane by clamping them onto a motor cable AND the vehicle. For car projects use tabs on the vehicle as connector points. For plane projects clamp onto the end of a wing.
Use the remote control to supply power to the vehicle and it will travel around the PowerAnchor. Each pair of bushes (upper and lower) is controlled by its own remote controller as indicated on the remote.
Each remote takes two AAA batteries. Always ensure these have charge.

If the vehicle goes backwards reverse the connections to the bushes. The maximum range of the controllers is 50m. Use the second set of bushes and hand controller to run two vehicles at the same time.
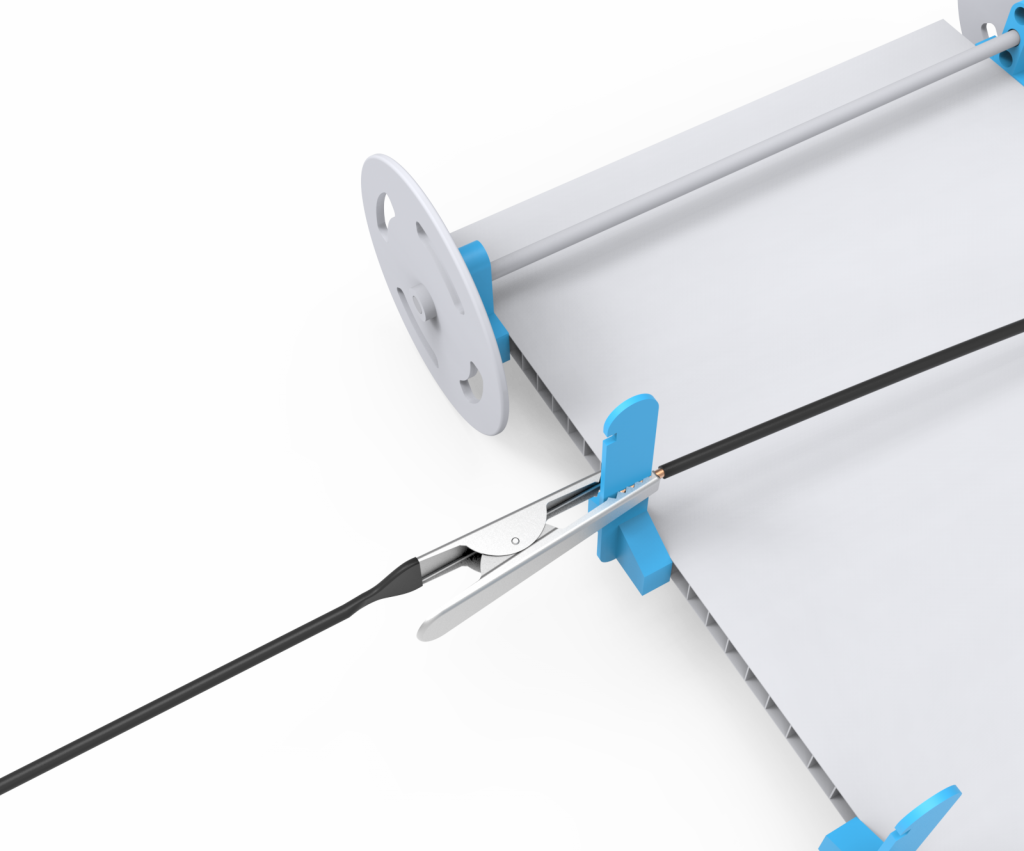
For car projects point the vehicle outwards by adjusting the effective length of each cable by pulling one through the cable tie.

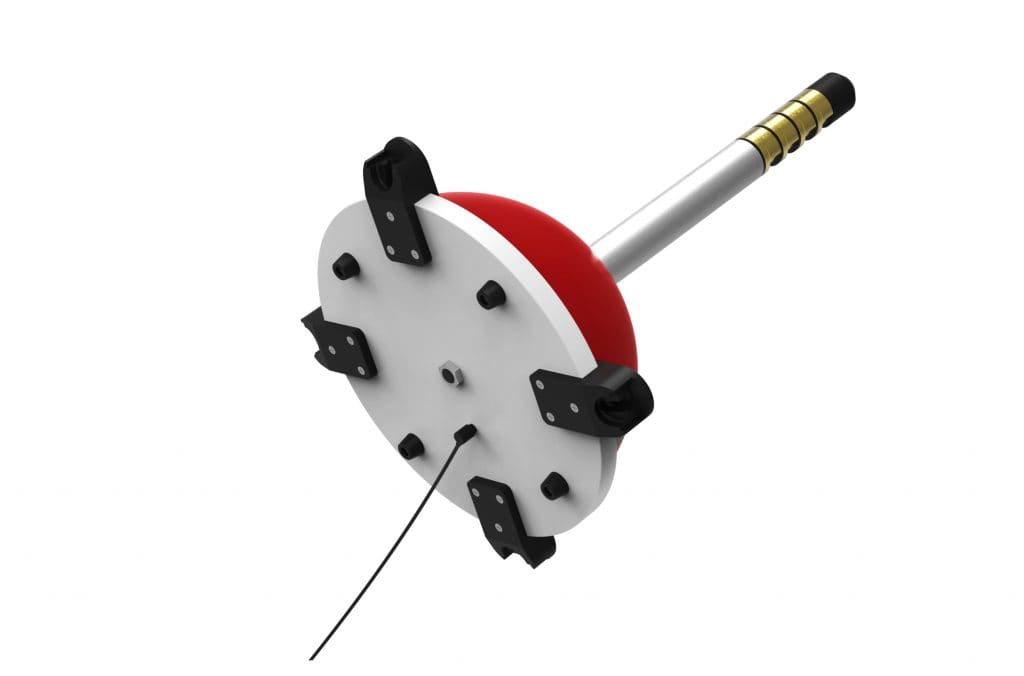
For aircraft projects attach the four legs by pushing them hard into the connectors. To remove, tap firmly at the top of the leg from the inside.
Do not attach legs for car projects.

When power is low, plug the charger into the charge point. Refer to the indicator lights on the powerpack to know when charging is complete.
Do not use the PowerAnchor while charging.
Fully recharge before packing away. A full charge will power over 10 000 laps.
If battery is flat then charge overnight. Do not charge for longer or the battery may reduce its maximum charge.
Bonus Data Logger
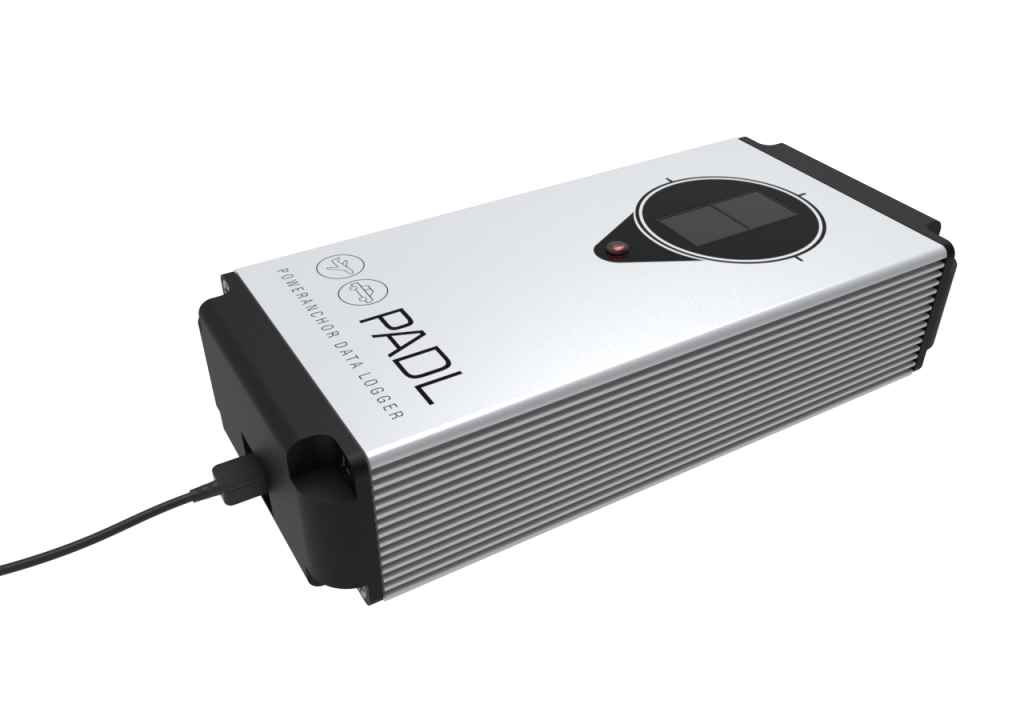
Use the free PowerAnchor data logger (PADL) to measure the speed of cars and planes as they go around the PowerAnchor.
For indoor use only.
For car projects use the software in car mode. Place the PADL on its side and point it directly at the PowerAnchor approximately 20cm from the car as it moves past. Listen for the ‘beep’ then start recording. The software will display the speed of the car.
For aircraft projects face the PADL upwards and use the software in flight mode. When the aircraft has reached full and consistent height, position the PADL under its flight path so that the plane wing flies over the PADL. Listen for the ‘beep’ and start recording. The software will display the speed of the aircraft. Planes must fly at a minimum height of 40cm.
Note: PADL performance can be affected by light conditions of the testing environment.
PADL positioning is important, but if a lap is not recorded (missed) any bad data is filtered out by the automatic data clean function on the software.
PADL Software
The PADL interface software is available in the online content area.
Connect the PADL to the laptop with USB cable. Open the software, connect using the top left icon.
When the PADL unit is in position and the software beeps it is ready to start recording the data. Click the green start button and data for each lap is recorded. Note: lap zero does not ‘beep’.
When enough data is collected that is sufficiently consistent the recording will stop and the result indicated with an arrow. The result is the average of the most reliable three consecutive sets of data. This is what is recorded as the result for the test.
Height accuracy for planes is within 1.5cm after data clean.
Vehicle are given a rating. For planes this is based on speed, height and payload (added weight. Digital scales provided) For car this is based on speed and payload. A rating over 100 is good; over 125 is very good. Payload is a user input.
The purple button resets, clearing the data.
These three icons are (in order):
- Connect to PADL unit. You will need to do this each time the unit is connected.
- Download the driver if your computer is not recognising the PADL. Only do this as a troubleshoot.
- Print report. This pdf report shows all student entered data and graphs.
DataCrunch Software
Students take the recorded data from the data logger and enter it into the DataCrunch software which is available in the online project content. Files can be saved and re-opened.
Each test series requires students to nominate the independent variable they have testing for. Ideally they will have more than three tests per series and several test series. For each test series students write an explanation of what they see going on in the graph.
The extrapolation function helps them to propose optimal values for the independent variables according to the chosen challenge. Other graphing functions such as extrapolation reliability, ignore outliers and line of best fit are powerful tools to help understand the relationships
between variables.
Tips:
- For car projects ensure the vehicle is pointing slightly outwards. This will help the car pull the tether cable tight.
- If legs do not all make contact with the ground, gently push the PowerAnchor downwards to spread the legs slightly.
- When landing a plane turn the controller off and on repeatedly reducing thrust to come in for a soft landing.
- After use, wind up tether cables carefully to avoid tangling. Store them in separate case compartments.
- Note that the data logger does not work in super bright environments such as outdoors
Troubleshooting:
- Use the correct hand controller.
- If the vehicle is going backwards switch the cables on the bushes.
- Ensure the cable clips are not touching each other causing a short circuit.
- Ensure tether cables are connected to the motor cables and attached to a part of the vehicle.
- Ensure the PowerAnchor is charged.
- Replace hand controller batteries (2 x AAA) as needed.
- If PADL does not detect passing vehicle reposition the PADL and turn off lights if necessary. If software is not responding then disconnect PADL, close app, reconnect PADL, restart software, refresh ports and select port.
- If PADL software is not recognising the data logger then install this driver: Download
Looking after your PowerAnchor:
- Always turn off after use.
- Do not use while charging.
- Charge batteries overnight. Any longer may reduce their charge.
- If the bushes become ‘clammy’ then polish all contact surfaces with brasso and a soft rag until shiny. Clean off all excess by wiping with isopropyl alcohol and a clean rag.
- When not in use for extended periods wrap the bushes in stretch plastic wrap.
- Ensure PowerAnchor is fully charged after use. This will maintain the life of the battery.
- When removing legs, push them directly outwards without rotating.
- Store PowerAnchor in the high impact case.
- Avoid touching the PADL reader. Clean with a soft cloth.
Safety:
- Create an exclusion zone around the PowerAnchor when in use to avoid collisions.
Technical
- The PowerAnchor houses a rechargeable Li-ion battery: 11.1V, 78Ah (86.58Wh)
- The PADL uses lidar at wavelength 905nm,1.5Watts, class A, beam spread 1 degree .
WARRANTY STATEMENT: (Australian customers): The manufacturer warrants that at the time of sale the PowerAnchor is of a saleable quality. If the unit or part of it is agreed to be faulty, that is, not performing as described herein, then a full refund or replacement will be offered on the following conditions: 1. A fault is reported to the manufacturer within 12 months of purchase where this is counted as the date of invoice; 2. the customer returns the faulty goods including all parts and accessories to the manufacturer within a reasonable time accepting that a replacement or refund will only occur upon the receipt of the faulty unit; 3.The fault is only due to normal use and not rough use or mis-use or any use other than as is described herein; 4. that in the case of a minor fault where a replacement part would be able to render the unit usable, the customer accepts this as a first option rather than full replacement; 5. The dome has not been separated from the base or the nut underneath the unit has not been removed unless done so under the instruction of the supplier or manufacturer.